Seed starting takes time up front, a little bit of cash, and lots of patience. Not all of your seedlings will start, and those that do my inexplicably die when their still babies. I haven't nearly mastered the craft yet, but the following is what I've picked up over a few years:
SOIL: Soil is dirt is soil, right? I took a Plant and Soil Science class in college, and if the professor overheard you talking about dirt, you'd lose 5 points for the day. Yes, it's that serious.
 |
| What we've used this season...we've had great luck with our seeds so far! |
CONTAINER: You have your seeds, your soil - now what to put them in? I've tried a few things over the years, from yogurt cups to the plastic wells and this year onto peat/manure pots. I moved to the peat pots for a reason: come transplant time, a season has not gone by where my roots were heavily damaged from taking plants out of plastic containers. This contributes significantly to transplant shock, and sets my plants back a good week on the growing schedule - a week I can't afford to lose up here in the mountains. Peat pots are cheap, provide nutrients to your plants as they compose and, best of all, you just pop the whole thing into the ground. Come transplant time, make sure you bury the pot completely, covering the top edges with at least a half inch of soil.
 |
| Our basil and cilantro seedlings in peat pots |
Water can also be a terrifyingly strong force to weak little roots systems, tearing soil from tiny little root hairs, bending fragile stems. This is why when I'm dealing with young plants, I only use self-watering systems, or watering from below. Water starts at the bottom of tray and is absorbed up through the peat pot and the soil till it reaches the roots. It's faster and easier to water this way, and it's much gentler on the plants.
 |
| Tomatoes in a fish tank where the stay warm and wet, just like they like it (Grow dome in the background). |
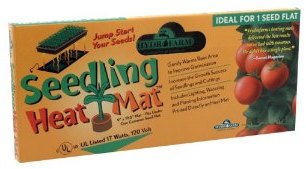
HEAT: There are two things that wake a seed up from suspended animation - water and heat. They're still under soil, so they don't really give a crap about light yet. Water was manageable, but as I mentioned in an earlier post I have an affinity for cold farmhouses. I thought lights might do it, but the spectrum of light that makes a good growing light doesn't give off a lot of heat. So this spring, I cracked the piggy bank and picked up an official seedling heat mat:
True to my Maine roots, I got the double wide. I have enough room for the fish tank, half a seed tray with the lid, half of one without. The best part? It seems to be working! My seeds are sprouting days to a full week ahead of what they were last year - this is a huge advantage. After the grow light, if you can spare $50 this is the tool that could be your germinating missing link.
LIGHT: See prior post for DIY light. My 4ft' home depot lamp is still at the cleaners getting desmoked, so I bought a relatively overpriced lamp at Gardeners Supply. Other than being much shorter, and only one bulb, it does have a reflective hood. I'm not so sold I'll be getting more, though I do like that you can chain multiples together.
 |
| If money weren't an issue, I'd be so down with one of these bad boys |
*****
I won't lie and say 'There! That's the basics!' because what I just dribbled all over the internet doesn't even begin to scratch the surface. The above have been my experiences, but I fail and flail every year and learn a little more each season.Post up your seed starting stories!

No comments:
Post a Comment